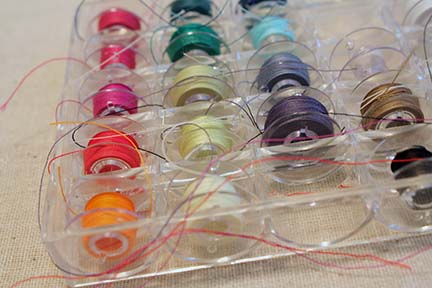
If you sew, you know that your bobbins can go from nice and organized to messy and stringy in a matter of minutes. Case in point:
Looks pretty bad huh? And I promise that I made them all nice and neat less than a week ago and didn’t make it more messy just for a picture! When you go to get one bobbin out, the others just unravel more making an even bigger disaster!
I searched online for bobbin clips to purchase. The only ones I found were for a pack of 10 for almost $10 on Amazon.They included the bobbins too, but they were for Brother machines. I sew on a Janome… Although they use very similar bobbins I didn’t want to pay $10 before shipping for it.
I knew there must be a better way. I needed something clear (so you can see your thread colors), flexible (to accommodate the different amounts of thread on each of your already wound bobbins), and cheap.
Enter my local home improvement store. Surely I could find something clear, flexible, and cheap there! I did! I present to you:
DIY Bobbin Covers
You’ll need just two things:
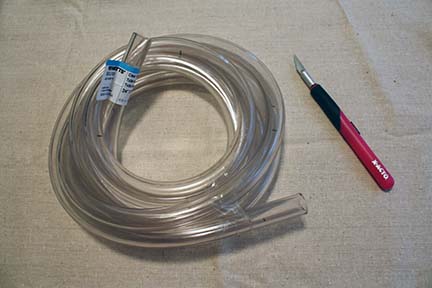
Clear Flexible Tubing (Found in the plumbing department at your local home improvement store. I got the kind that was 3/4″ on the outside with a 1/2″ diameter on the inside.)
X-Acto Blade
Ready to get going?
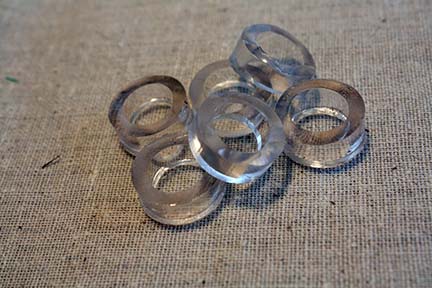
Being careful with the sharp blade, slice off some 1/4″ rings from the tubing.
Then cut down one side of each ring, opening it up.
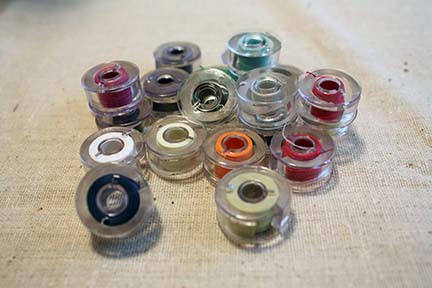
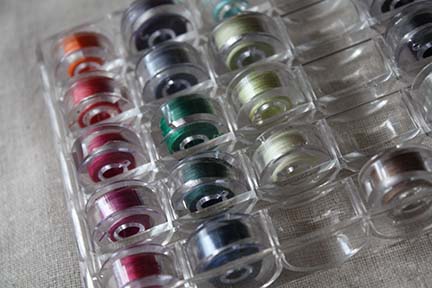
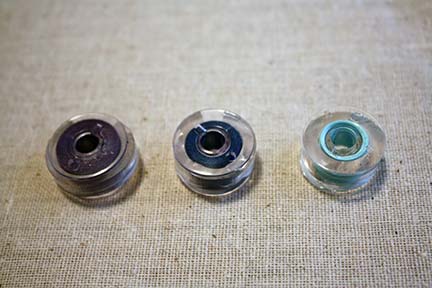
Wrap up your bobbins and slide the ring on top of your thread.
Place back in your storage container. That’s it! How easy and cheap was that? I’m thinking this would make an awesome little gift for the sewer in your life, quilt group, sewing swap, etc.
I love that they are useful no matter how full or empty your bobbin is. You don’t need a different size of tubing, it works for all your bobbins!
Happy Crafting,
Erin

Many times when I get the motivation to sew/create it is “oh no” everything is in such a mess. Will have to work too long to get to the supplies so I just give up. This jewel of an organizer will be one more way to eliminate my lame excuses. Thank you for sharing.
This is fantastic! I have been using a tip I found a few years ago that uses those black plastic spiral binding thingies – but this is so much better!
Simply Brilliant!
I was just in the fabric store specifically looking for bobbin clips. Thank you sooo much for the idea. I’m on my way out the door now to by some tubing.
Love it! I will use this idea.
It’s amazing how inventive we women are!!!
I am too (to Lowe’s)! This looks so easy!
I use little girls pony tail holders. I use one colour for embroidery threads and another for regular sewing threads to make sure I don’t use the wrong ones. You can get a big bunch of them at the dollar stores for little cost
love these bobbin clips and use them too. another ‘clip’ one can use are those pencil grips sold in stores and when cut into circles they too serve as bobbin clips. they come in colors if you want to use them on color thread.
Loved the idea,I have this issue all the time .Thank you for sharing,will start chopping hose pipe right away.:D
could i subscribe to your blog?
thnks!
Yep – brilliant!
OMG – I think you’re brilliant.
Brilliant! I think I love you! ????
OMG you are Brilliant.
I just happened upon this tutorial and I am SO thankful for it. I have been looking for an inexpensive way of keeping my bobbins (22) from unwinding when I try to get just one from my bobin tray. My husband just happened to have that exact size of tubing so I now have all my bobbins under control. THANK YOU so much for this information.
It works!!!!! I made heaps gave some to a friend as well.
Idea genial!!!
Way too cool! I love looking at something and seeing another way to use it that others dont get! Love the way you think! And thanks for sharing!
HEY ! NOW THAT IS ONE NEAT IDEA , VERY CLEVER,AND THANKS FOR SHARING
Great idea now my bobbins wont be a mess anymore.
Wow! Great idea, thanks! I just reorganized my bobbin case last night and within about 10 minutes it was everywhere again. Ugh! Definitely doing this soon! :)
Brilliant! thanks for sharing :)
I love your bobbin covers idea. Can’t wait to get some tubing and try it. Thanks. Linda
I just tried to make some today, and I had a question…. How were you able to cut the 1/4″ sections so straight and even? I found it very difficult to cut through the material but there has to be a better, easier way! I was using a brand new blade btw…
Brilliant! I was just looking at the snarly mess that is my bobbin box last night and wishing I knew of a solution. Can’t wait to see the look on my husband’s face when I tell him I need plastic tubing from the hardware store!!!
Thank you for sharing this wonderful idea. Just what I needed for my bobbin thread chaos.
I have been sewing for many, many years……and thought I would NEVER be able to keep my bobbins from trailing the thread EVERYWHERE!!! Thank you so much. I will be using this and thinking of you every time I use my bobbins!!!!!
I have looked for these clips for over a year. I told my boyfriend a few days ago the problem i was having and he came up with the same thing as you with the tubing. Then I came accross you site….wow great minds think alike.
You are amazing! This has to be a V8 moment…lol another DIY project to mark after my list. thank you
This is ingenious!!!! And my husband works at a building center. Hee-Hee-Hee!
Thanks for the awesome idea.
This is so awesome!! Thank you so much for posting this! I just happened to have this size tubing! I was just telling my husband the other so that I wanted him to print some bobbins clips for my bobbins.. I have a lot of them. :) Thanks again!
ABSOLUTELY BRILLIANT!! I love going to the home improvement to bring ideas back to my sewing room! I bought a similar product…I mean from the plumbing aisle. It’s black crinkled tubing and I cut it into pieces and slit the side and surround my embroidery thread spools with it, to keep the stray strands from driving me crazy. I don’t have a picture, sorry. But going to the plumbing aisle, looking for stuff that can be chopped, cut, split and it still retains its tubing shape, that’s the stuff for me! $10 for 10 bobbin thingys? I think not!!
Mc D or sonic straws work great also. They jsut need to be the wide straws.
The straw idea is fabulous! I have bunches of them and never use them. Well, that has changed, and my bobbins are neat! (-;
Why didn’t I think of that!!! Was just looking at some rather expensive clips and ran into your blog. What a great, cheap idea. I am sending my husband to the hardware store tomorrow!!
Great tip!!!
Brilliant idea! simple & cheap.
This is amazingly simple idea!! Thanks so much for posting it. Storing bobbins has always been a hassle
I saw this today and went to Lowes and got the tubing. My bobbins are now done. TFS! Will cut some for my daughter too.
Love it……
Yes, it’s love!
Brilliant!
Thank you so much, this is great!
Even better…use a PVC Ratchet Cutter!
Amazing! I will have my husband make this!
Great idea ! Such a simple solution. Hats off to you
I saw this on Pinterest some time ago and I love it. Woot woot!
I realy liked your idea it works well I put my bobbin on my thread stand then put my thread over that. I know which bobbin goes with which thread this way and know looking which ones have bobbins already done.
this is totally awesome. Thank you so much for your brilliant idea.
What a clever idea!
OH MY!! This 73 yo retired (male) engineer COULDN’T figger out a way to do this. HAD to be a better way than spending $1/per. I also put the matching bobbins on my thread spindles caddy. But they’re a little short. Off to the hdwe store and another fun useful project. Guess the kitchen floor will have to wait.
I have just seen this idea on pininterest, I’ sure my husband has some of this tubing in his shed. I’ll have to raid it tomorrow
So many threads come in similar shades of the same color, it can be difficult which wound bobbin matches a certain spool of thread. Solution – write the color number on the bobbin sleeve. A little alcohol will remove the mark if you no longer have a matched set.
Erin that was a great ideal, but I got the tubing free. If you or a family member or someone else you know is on oxygen the tubing that goes from the oxygen tank to the nasal cannula (the part that goes into the openings of your nose} works good also. They or clear or light green. If you get the green ones you can pull the end of your thread up to the top of the bobbin before putting the tubing on. This leaves a piece of thread showing, so you can tell the color.Thanks for your ideal.
Aren’t you the clever one!?! I have been sewing for over 40 years and this is the most brilliant idea I’ve seen…Thank you so much. I am going to the hardware store tomorrow and end decades of frustration in my sewing box.
bonjour à tous, Je porte le joli nom de Élise.
Je suis agée de 40 ans : je n’ai pas de problème à ce sujet .
Je suis une hôtesse d’accueil … Si je suis parfois joyeuse, ce n’est pas un défaut ?
Hmm it appears like your website ate my first comment (it was super long) so I
guess I’ll just sum it up what I had written and say, I’m thoroughly enjoying your
blog. I too am an aspiring blog writer but I’m still new to everything. Do you have any recommendations for rookie blog writers? I’d certainly appreciate
it.