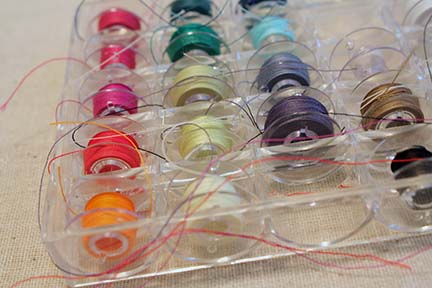
If you sew, you know that your bobbins can go from nice and organized to messy and stringy in a matter of minutes. Case in point:
Looks pretty bad huh? And I promise that I made them all nice and neat less than a week ago and didn’t make it more messy just for a picture! When you go to get one bobbin out, the others just unravel more making an even bigger disaster!
I searched online for bobbin clips to purchase. The only ones I found were for a pack of 10 for almost $10 on Amazon.They included the bobbins too, but they were for Brother machines. I sew on a Janome… Although they use very similar bobbins I didn’t want to pay $10 before shipping for it.
I knew there must be a better way. I needed something clear (so you can see your thread colors), flexible (to accommodate the different amounts of thread on each of your already wound bobbins), and cheap.
Enter my local home improvement store. Surely I could find something clear, flexible, and cheap there! I did! I present to you:
DIY Bobbin Covers
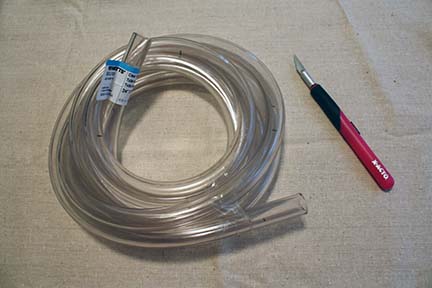
You’ll need just two things:
Clear Flexible Tubing (Found in the plumbing department at your local home improvement store. I got the kind that was 3/4″ on the outside with a 1/2″ diameter on the inside.)
X-Acto Blade
Ready to get going?
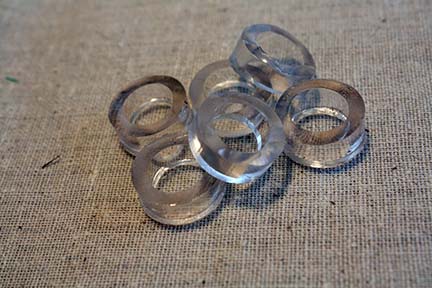
Being careful with the sharp blade, slice off some 1/4″ rings from the tubing.
Then cut down one side of each ring, opening it up.
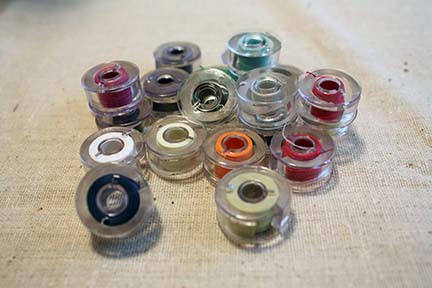
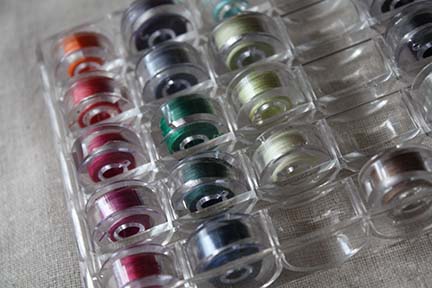
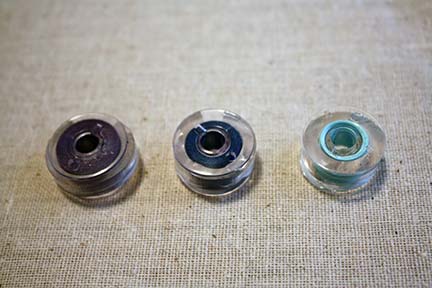
Wrap up your bobbins and slide the ring on top of your thread.
Place back in your storage container. That’s it! How easy and cheap was that? I’m thinking this would make an awesome little gift for the sewer in your life, quilt group, sewing swap, etc.
I love that they are useful no matter how full or empty your bobbin is. You don’t need a different size of tubing, it works for all your bobbins!
Happy Crafting,
Erin

Perfecto! voy a hacerlo porque está genial!.
Is perfect! I do that because it is great
Charo
http://www.cosiendoyaprendiendo.blogspot.es
Erin, this is a very clever idea, i am going to do it right away (just bought a bobin lot today!) xxx
WOW… found you via Pinterest… LOVE? it and will definitely be ding this for my overflowing, tangle of a mess of bobbins!
This is a fantastic idea! TFS.
You’re brilliant!!! That is the coolest idea I have ever seen!!
Thank you….Thank you…..Thank you!!!!
This is brilliant, Erin – thank you!
So glad everyone is finding this tip useful! I figured that I couldn’t be the only one with the messy bobbin problem! Thanks for taking the time to comment!
such a great idea- why didn’t I think of it? lol Gonna be sharing w/ my sewing group @ our next meeting. Thanks!
I’m so glad you came up with such a simple solution because I’ve had such an issue with this, too. Definitely pinning this one!
I found this on Pinterest and it will fix a problem I have been having with so many different colors getting tangled up in my bobbin box.
Amazing idea! Thanks for sharing!
Great idea! Thanks for sharing!
Fantastic idea!! I cannot wait to put it to work in my massive chaotic bobbin box! Thank you!
the best thing I’ve seen on Stumble – can you tell that I’m a sewing nut?
HomeHardware here I come .I’ll have a meter of this tubing please
Brillant! This is a simple solution to a universal problem. Thank you!
Yes! Brilliant! Thanks for sharing.
Absolute genius!
My a-ha moment of the day!!! Thanks a ton!
You are a GENIUS! Thank you so much for sharing! I don’t sew much but my bobbins are a MESS.
Very good idea !
YOU. ARE. A. GENIUS!!! Being a little OCD, it always bugs me when my bobbins return to their messy state as soon as I turn my back. This is fantastic! Thank you!
Oh, my goodness. This is absolutely brilliant! I NEED this plastic tubing RIGHT NOW!
These are awesome! I just inherited 4 (yes, four!) boxes of prefilled bobbins for my old Pfaff and I can’t wait to make some of these!
Love this idea….found u on pinterest…thanks for sharing.
Brilliant!
Great idea I also found this on pinterest
I love your idea. You have a great imagination.
aedesigns11.blogspot.com
Very smart idea, great for gifts like you said.
Great Idea! Will work for many other applications too. Going to find some tubing right now to hold my wire together (wire jewelry)
Thank You So Much!!!! Been trying to find a way to keep my bobbins under control. I tried the ponytail holder idea, but like you said, I really wanted to be able to see the bobbins. This is perfect & I think I even have some plastic tubing somewhere.
I found this on Pinterest ~ Thanks so much for sharing a great idea! (And don’t you love your Janome?!)
even after I clean them up they still look a mess – with this idea at least I want keep pulling the entire container off the shelf trying to get just one bobbin out
have used this for years and it is about the best and least expensive way to solve this problem
This is the most clever idea I’ve ever found on a blog! For years I have fought with the messy tangle of thread ends. Thank you for such an inexpensive and easy solution. I am also going to try this same idea with my ribbons.
this is so clever….I was using the tiny size of pony tail bobbers….but THIS sup-passes that by a million miles….I do quilts for Project Linus and my bobbins are multiplying….this is so wonderful…thank you !!
This is brilliant! I have been struggling with this problem as well. Thank you so much for sharing your wonderful solution.
Thank you so much for this wonderful idea!
Absolutely genius. What a wonderful and inexpensive way to control our multiple bobbins. Bravo girl!!
This is awesome!! I have a huge tangled mess in my bobbin box. I’m going to Home Depot or Lowes tomorrow! Thank you for this great idea! Found this on Pintrest by the way.
GENIUS!
You are my new hero!!! Thank you.
My husband made some of these for me. Before cutting the tubing, he drew a line in permanent yellow marker the length of the tubing. That way I could see at a glance where the beginning/end was. Also, my Bernina bobbins are taller than my Pfaff bobbins, so he made them to fit the smaller size.
Do you have any trouble getting them off if the bobbin is not full. I have been using “self-stick” tape so I could make a little tab to get it off.
Found this through a posting on PILLOWS A-LA-MODE…what a great idea! My bobbins look just like your photo at the top. Reckon it’s time for a little REmissionary project here – I love finding this kind of tip! Thanks so much.
Found your site courtesy of http://pillowsalamode.wordpress.com/
Love, love, love this idea! Will definitely be trying it. Thanks for sharing.
What a genius idea! Can’t believe I didn’t think of something similar. Thanks so much for the idea, I think I’m going to get that tubing tomorrow when I go out! :)