Since I’m moving for the next couple of weeks I’ve asked my DT to step in for a few Tutorial Tuesday posts! (Don’t forget about the moving sale! 20% off of Everything with code MOVE in the store until this Friday! I’m running low on some of the stamp sets, so order now before you have to wait about 3 weeks for them to be back in stock after the move!) Thanks Michele for this fun Note Card Holder!
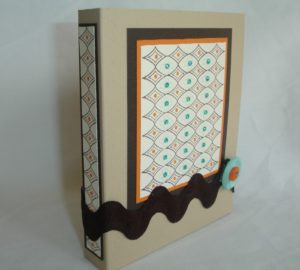
“Hi there! It’s Michele bringing you a fun Note Card Holder tutorial that uses the Build A Border set.
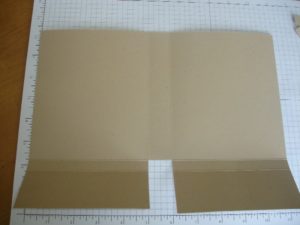
To create the folder, score at 2 and 2 1/2 inches on the short side of an 8 1/2 x 11 sheet of cardstock. On the long side, score at 5 and 6 inches, then cut out the piece where the score lines meet up to the top score line.
Simply fold all the score lines inward to create the structure of your folder.
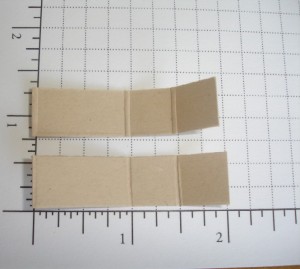
Cut the scrap piece into 2 equal long halves and score at 1 and 1 1/2 inches. These will later be your reinforcement pieces.
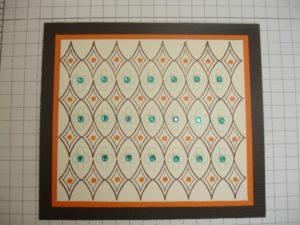
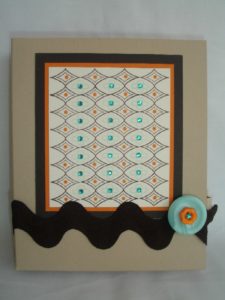
To create your decorative front panel, stamp the diamond border 4 times in brown ink. This repeated pattern will create blank ovals. In these ovals, stamp the flower border with aqua ink. Stamp the dot border with orange ink into the diamonds. Trim your card stock to desired size and then layer over orange and brown card stock. Finally, add rhinestones into flower centers.
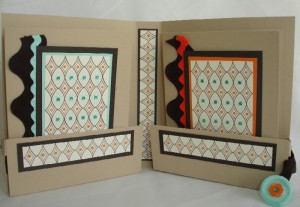
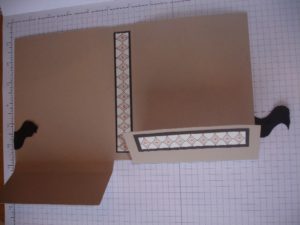
Next create decorative panels for the interior folder flaps as well as the interior and exterior spine. Then,using glue dots, adhere wide Ric Rac starting under left panel and wrap around exterior, leaving approx 2 inches on the right side unattached.
Stamp a flower image onto the reinforcement pieces and using Scor-Tape, adhere long end onto inside of folder flap and short end onto folder.
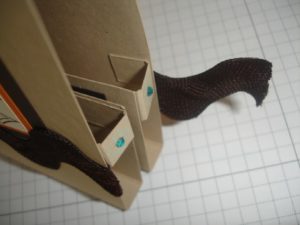
Adhere end of ric rac to button back and add double sided adhesive Velcro. When you wrap button around to front, this will give you perfect placement for Velcro closure.
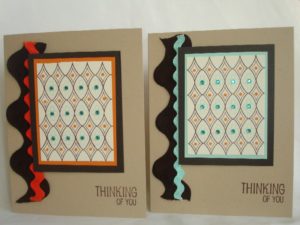
To create cards, follow same directions as the front decorative panel. To create 2 different looks, I backed one with aqua card stock and one with orange card stock and then added a scallop edge of coordinating ric rac that I then layered over the same wide ric rac as the folder.
Now the really hard part…do you give away or keep it for yourself ?!
Have an awesome Tuesday!!”
fabulous project.. I need that border set now!
woot woot!!!! excellent project!!!
Great project!
Awesome project!!!
so cute! What a great idea!